# JEngine_Sync
**Repository Path**: NKG_admin/JEngine_Sync
## Basic Information
- **Project Name**: JEngine_Sync
- **Description**: No description available
- **Primary Language**: Unknown
- **License**: MIT
- **Default Branch**: master
- **Homepage**: None
- **GVP Project**: No
## Statistics
- **Stars**: 1
- **Forks**: 0
- **Created**: 2020-07-19
- **Last Updated**: 2020-12-19
## Categories & Tags
**Categories**: Uncategorized
**Tags**: None
## README
# JENGINE v0.3.1
JEngine is a streamlined and easy-to-use framework in Unity.
JEngine has its own behaviour based on MonoBehaviour but much more friendly to manage lifecycle. (You can make loop easier using JEngine).
JEngine has a method-chaining style of coding, which makes your code much more stramlined and beautiful.
JEngine supports hot update, which is base on [XAsset](https://github.com/xasset/xasset) & [ILRuntime](https://github.com/Ourpalm/ILRuntime) which supports hot-update codes and resources in Unity.
JEngine has its own purpose to help developers write powerful codes which are streamlined and beautiful; and to help developers distibute their games easier (eg. hot update).
[中文请点这里](#中文说明)
## Latest Features
- Combined **Unity-GUI-Redis**, which is also part of **JEngine**, now belongs to **JEngine.Redis** namespace
- Update **XAsset** dependency to latest version:
- Supports **network monitor**
- Build bundles name by **hash**
- Tiny improvment on the framework
- Rewrite **ILRuntime**:
- Supports **OnDestory** method called by MonoBehaviour
- Tiny improvment on the framework
- **JEngine.UI** is now coming:
> Only supports Text at the moment
- Based on **JUIBehaviour**
- **Method-Chaining** which makes more stramlined and beautiful codes
- Unique and managable **lifecycle**
- Improve **JUIBehaviour**
## Features
- Automatically generate **Update Resources**
- Automatically handle **Hot-update DLL**
- Update [Hot-update](#What-is-Hot-update) codes and resources from server (Base on XAsset & ILRuntime)
- Supports development mode which **loads dll and resources from local**
- **JEngine.Redis** is built for enhancing your productivity of development when you are using Redis in your game made by Unity
- **JUIBehaviour** is based on MonoBehaviour but much more friendly to **manage lifecycles**
- **JEngine.UI** supports **method-chaning** coding in C# which makes your codes much more stramlined and beautiful.
## Future Features
- ~~Supports local hot-update resources development in Unity Editor~~
- Encrypt Hot-update DLL and decrypt in runtime
- Optiimize logics which can improve process speed (As always)
- *Unity Editor FTP Tool (Maybe)*
## What is Hot update
As we acknowledged, when developers update their apps/games, users will have to download the latest version from app stores, this is what we called "cold-update". Hot-update, sounds like a antonym of normal update process, it is a way which developers upload their newest codes & resources into their web server, and since users open their apps/games, they automatically download the latest codes and resources from the server, and those codes and resources reloads, overrides the old versions.
It sounds simple right? But it is **actually not** easy to implement.
In the old days, we can use a technology which is called "JIT" to implement hot-update, but then App Store blocks this way as their hardware doesn't supports JIT, which means developers needs to find a new way to solve it out.
There are two main ways to implement hot-update:
1. Use Lua
- Lua is a script language just like javascript, when Unity loads the game, this solution will make a virtual environment which runs those lua codes
- Lua files are just like other text files, it ends with .lua and can be readed as TextAsset
- You have to learn Lua first to use this solution
2. Use ILRuntime
- ILRuntime is a solution which loads dll (What you can get after you build your c# soulution) in game and loads the methods in it
- ILRuntime runs faster then lua except doing calculation
- ILRuntime is written in c# and easy to use, that is the reason why JEngine is based on ILRuntime, not Lua
## Directory Structure **(IMPORTANT)**
Please clone this framework into your project and keep this directory structure
```
.
├── Assets
│ ├── Dependencies
│ │ ├── ILRuntime
│ │ │ ├── Editor
│ │ │ ├── Essential
│ │ │ ├── Generated
│ │ │ └── ILRuntime
│ │ ├── JEngine
│ │ │ ├── Core
│ │ │ └── Editor
│ │ ├── LitJson
│ │ └── XAsset
│ │ ├── Editor
│ │ ├── Resources
│ │ ├── Runtime
│ │ ├── ScriptableObjects
│ │ └── UI
│ ├── HotUpdateResources
│ │ ├── Controller
│ │ ├── Dll
│ │ ├── Material
│ │ ├── Other
│ │ ├── Prefab
│ │ ├── Scene
│ │ ├── ScriptableObject
│ │ ├── TextAsset
│ │ └── UI
│ ├── Init.unity
│ └── Scripts
│ ├── Init.cs
│ └── APIs
├── Builds
├── DLC
├── HotUpdateScrpts
├── ProjectSettings
```
### Description of those Directories
- **Assets** - Source file for Unity
- **Dependencies** - All 3rd parties source code can be put in here
- **ILRuntime** - ILRuntime source code + demo
- **JEngine** - JEngine source code (only a few right now, will be extended)
- **XAsset** - XAsset source code (with modifications)
- **LitJson** - LitJson source code, which provides converting json in c# (with modifications which ILRuntime can use it, which means you can use LitJson in your hot-update code and will be compatible with ILRuntime)
- **HotUpdateResources** - All hot-updatable resources will be stored here
- **Controller** - Drop your animation controller files here which will be hot-updated
- **Dll** - Once you build your hot-update code solution, dll file will go into here and will automatically generate a .bytes file which can be hot-updated, *No need to put things here except HotUpdateScripts.dll*
- **Material** - Drop your material files here which will be hot-updated
- **Other** - Drop your files here which will be hot-updated (JSON files, WAV files,etc.)
- **Prefab** - Drop your prefab files here which will be hot-updated
- **Scene** - Drop your scene files here which will be hot-updated
- **ScriptableObject** - Drop your scriptable object files here which will be hot-updated
- **TextAsset** - Drop your text files here which will be hot-updated
- **UI** - Drop your image files (.png format) here which will be hot-updated
- **Scripts** - all scripts which will not be hot-updated but will be used in game
- **Init.cs** - A **REALLY IMPORTANT** script which luanch the whole game
- **APIs** - Drop all interfaces/methods/apis/etc you have here
- **Init.unity** - the luanch scene of your game, which will do hot-update logics in here
- **Builds** - When you build your game, store those builds here (.apk, .xcodeproj, .app, .exe,etc.)
- **DLC** - Generated hot-update resources will be store here, all you need to do is to put the whole DLC directory and files include, into your web server
- **HotUpdateScripts** - Your hot-update scripts will be store here
- **HotUpdateScripts/Program.cs** - Initialization for hot-update code, **you can change it but do not delete it, keep the RunGame method in Program.cs**
- **HotUpdateScripts/JEngine** - **Do not delete this directory as JEngine codes are in it**
- **ProjectSettings** - Some project settings here, eg. allow unsafe code
## JEngine Hot Update Logics

## Quick Start
#### Basics
> The basics tells you how to use this framework in basics
1. Clone this project
2. Open **ClonedProject/Assets** via Unity
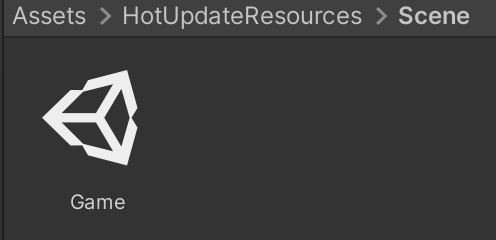
3. Go to **HotUpdateResources/DLL & HotUpdateResources/Scene**, make sure you have **HotUpdateScripts.dll & Game.unity**
 4. On top menu, select **JEngine/XAsset/Build Bundles**
 5. Once it has built, upload your the whole **DLC** directory into your server (If you don't know how to do it, google search how to build a web server)
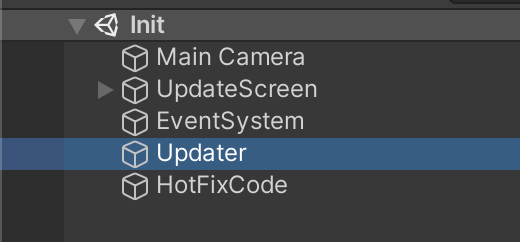
6. Go to **Init scene** in Unity, choose **Updater** in hierarchy
5. Once it has built, upload your the whole **DLC** directory into your server (If you don't know how to do it, google search how to build a web server)
6. Go to **Init scene** in Unity, choose **Updater** in hierarchy
 7. In Inspector, change **Base URL** to your web host address which can locates hot-update files
> Format: http://your-ip:your-port/DLC/ or http://your-domain/DLC/
>
>
7. In Inspector, change **Base URL** to your web host address which can locates hot-update files
> Format: http://your-ip:your-port/DLC/ or http://your-domain/DLC/
>
>  8. Now, run your game, and you will feel how hot-update works!
> Note that stuffs shown in Unity Demo is in Chinese and will supports English in the future
#### Extensions
> The extensions will show you how to hot-update your game in coding levels
1. Open **ClonedProject/HotUpdateScripts/HotUpdateScripts.sln**
2. Find **Program.cs** and open it
3. Change something but **DO NOT DELETE** *RunGame()* Method
4. **Build Solution**
5. Go back to Unity, **redo step 4 & 5 in the Basics**
6. Run Game, and you will see the differences which you made
#### Developement Guide
> This will enable you quick develop your game and you don't need to upload your latest hot-update resources into your server **(which saves your time)**
1. Go to Unity Editor, open **Init scene**
2. Choose **Updater** from inspector
3. **Enable development mode** in Updater script section
#### Common "Bugs"
- Cannot find Delegate Adapter for: **XXX**, Please add following code into Assets/Scripts/Init.cs 'InitializeILRuntime()' Method:
> Just do what it asked you to add into **Scripts/Init.cs, 'InitializeILRuntime()' Method**
>
> 
## Using JEngine Features in Hot Updatable Scripts
#### JEngine.UI
> JEngine now contains a new class which enhance the productivity of your UI (Only Supports Text at the moment)
>
> Why choose JEngine.UI?
>
> - Method-Chaning coding
> - Simple but powerful
1. In your Hot Update Scripts, and in your c# file, add the import at the top:
```c#
using JEngine.UI;
```
2. Create a JUI with **AddComponent** Method:
```c#
//Here it is an example of JUIText
JUIText t = GameObject.Find("Canvas/Text").AddComponent();
```
3. You can choose whether to give this JUI actions:
```c#
//To Init it
t.onInit(t =>
{
});
//To Run it
t.onRun(t =>
{
});
//To Loop it
t.onLoop(t =>
{
});
//When it has ended
t.onEnd(t =>
{
});
```
4. **To activate the JUI (IMPORTANT)**:
```c#
t.Activate();
```
5. **All done!** (Remember to call **Activate** method when if you want to activate a JUI)
##### Extension
1. Method Chaining:
```
JUIText t = GameObject.Find("Canvas/Text").AddComponent()
.onInit(t1 =>
{
})
.onRun(t2 =>
{
})
.onLoop(t3 =>
{
})
.onEnd(t4 =>
{
})
.Activate();
```
2. Example:
```c#
public class Example
{
public void Start()
{
int i = 0;
JUIText t = GameObject.Find("Canvas/Text").AddComponent()
.onInit(t1 =>
{
t1.Text.text = "I have been Inited!";
Debug.Log(t1.Text.text);
})
.onRun(t2 =>
{
t2.Text.text = "I am Running!";
Debug.Log(t2.Text.text);
//Set the loop mode and frequency
t2.frame = false;//Run in milliseconds
t2.frequency = 1000;//Run in every 1000 ms (1 second)
UnityEngine.Object.Destroy(t2.gameObject,6);
})
.onLoop(t3 =>
{
i++;
t3.Text.text = "This is the " + i + " times that I changed!";
if (i >= 5)
{
t3.Text.text = "I will be destoryed in 1 second!";
}
})
.onEnd(t4 =>
{
Debug.Log("My lifecycle has been ended!");
})
.Activate();
}
}
```
3. Controls the frequency of a loop:
**JUI** inherits from **JUIBehaviour**, which can manage the mode and frequency of loop.
- **frame** is a bool value which holds whether the loop runs in frames or in milliseconds
- **frequency** is a int value which holds the interval of loops (in frame counts when **frame** is true or in milliseconds)
#### JUIBehaviour
> JEngine now contains a **new behaviour** base on MonoBehaviour but **runs better**
>
> Why choose JUIBehaviour?
>
> - Simple lifecycle
> - Less codes to implement loops
> - Uses coroutine rather than methods to do updates
1. In your Hot Update Scripts, and in your c# file:
Add import at the top:
```c#
using JEngine.LifeCycle;
```
2. Inherit **JUIBehaviour** in your class
```c#
namespace HotUpdateScripts
{
public class Sample : JUIBehaviour
{
//ToDo
}
}
```
3. There are four main methods in **JUIBehaviour**
- Init => When this class has been added to an Unity GameObject
- Run => This method will be called after Init
- Loop => This method will loop in specific mode and specific frequency
- End => Will be called when the GameObject with this class has been destoryed
4. Example Showcase:
```c#
using UnityEngine;
using UnityEngine.UI;
using JEngine.LifeCycle;
namespace HotUpdateScripts
{
public class Sample : JUIBehaviour
{
public Text HelloText;
public int times;
public override void Init()
{
HelloText = GameObject.Find("Canvas/Text").GetComponent();
times = 0;
}
public override void Run()
{
//Here in run method, we set up the frequency and mode of loop.
frame = false;// Not loop in frame, but in milliseconds
frequency = 1000;//Loop in 1000ms => 1 second
/* OR:
* frame = true;// Loop in frame
* frequency = 10;//Loop in every 10 frames
*/
}
public override void Loop()
{
HelloText.text = "HELLO JEngine * " + times + " times";
times++;
}
}
}
```
5. As you might see, in **Run** method, there is an assignment of **frame and frequency** variable, these variables controls **loop** method.
- frame: **bool**, when it is true, loop runs in **frames**; or loop runs in **milliseconds**
- frequency: **int**, it holds the **interval of frames or milliseconds** which calls loop method
## Development Environment
- Debuging Unity Engine Version: 2019.3.13f1
> Should supports Unity Engine From 2018 LTS til the latest
- .net Environment: .net 2.0 standard
- Operating System: MacOS 10.15.5
> Should also supports windows
8. Now, run your game, and you will feel how hot-update works!
> Note that stuffs shown in Unity Demo is in Chinese and will supports English in the future
#### Extensions
> The extensions will show you how to hot-update your game in coding levels
1. Open **ClonedProject/HotUpdateScripts/HotUpdateScripts.sln**
2. Find **Program.cs** and open it
3. Change something but **DO NOT DELETE** *RunGame()* Method
4. **Build Solution**
5. Go back to Unity, **redo step 4 & 5 in the Basics**
6. Run Game, and you will see the differences which you made
#### Developement Guide
> This will enable you quick develop your game and you don't need to upload your latest hot-update resources into your server **(which saves your time)**
1. Go to Unity Editor, open **Init scene**
2. Choose **Updater** from inspector
3. **Enable development mode** in Updater script section
#### Common "Bugs"
- Cannot find Delegate Adapter for: **XXX**, Please add following code into Assets/Scripts/Init.cs 'InitializeILRuntime()' Method:
> Just do what it asked you to add into **Scripts/Init.cs, 'InitializeILRuntime()' Method**
>
> 
## Using JEngine Features in Hot Updatable Scripts
#### JEngine.UI
> JEngine now contains a new class which enhance the productivity of your UI (Only Supports Text at the moment)
>
> Why choose JEngine.UI?
>
> - Method-Chaning coding
> - Simple but powerful
1. In your Hot Update Scripts, and in your c# file, add the import at the top:
```c#
using JEngine.UI;
```
2. Create a JUI with **AddComponent** Method:
```c#
//Here it is an example of JUIText
JUIText t = GameObject.Find("Canvas/Text").AddComponent();
```
3. You can choose whether to give this JUI actions:
```c#
//To Init it
t.onInit(t =>
{
});
//To Run it
t.onRun(t =>
{
});
//To Loop it
t.onLoop(t =>
{
});
//When it has ended
t.onEnd(t =>
{
});
```
4. **To activate the JUI (IMPORTANT)**:
```c#
t.Activate();
```
5. **All done!** (Remember to call **Activate** method when if you want to activate a JUI)
##### Extension
1. Method Chaining:
```
JUIText t = GameObject.Find("Canvas/Text").AddComponent()
.onInit(t1 =>
{
})
.onRun(t2 =>
{
})
.onLoop(t3 =>
{
})
.onEnd(t4 =>
{
})
.Activate();
```
2. Example:
```c#
public class Example
{
public void Start()
{
int i = 0;
JUIText t = GameObject.Find("Canvas/Text").AddComponent()
.onInit(t1 =>
{
t1.Text.text = "I have been Inited!";
Debug.Log(t1.Text.text);
})
.onRun(t2 =>
{
t2.Text.text = "I am Running!";
Debug.Log(t2.Text.text);
//Set the loop mode and frequency
t2.frame = false;//Run in milliseconds
t2.frequency = 1000;//Run in every 1000 ms (1 second)
UnityEngine.Object.Destroy(t2.gameObject,6);
})
.onLoop(t3 =>
{
i++;
t3.Text.text = "This is the " + i + " times that I changed!";
if (i >= 5)
{
t3.Text.text = "I will be destoryed in 1 second!";
}
})
.onEnd(t4 =>
{
Debug.Log("My lifecycle has been ended!");
})
.Activate();
}
}
```
3. Controls the frequency of a loop:
**JUI** inherits from **JUIBehaviour**, which can manage the mode and frequency of loop.
- **frame** is a bool value which holds whether the loop runs in frames or in milliseconds
- **frequency** is a int value which holds the interval of loops (in frame counts when **frame** is true or in milliseconds)
#### JUIBehaviour
> JEngine now contains a **new behaviour** base on MonoBehaviour but **runs better**
>
> Why choose JUIBehaviour?
>
> - Simple lifecycle
> - Less codes to implement loops
> - Uses coroutine rather than methods to do updates
1. In your Hot Update Scripts, and in your c# file:
Add import at the top:
```c#
using JEngine.LifeCycle;
```
2. Inherit **JUIBehaviour** in your class
```c#
namespace HotUpdateScripts
{
public class Sample : JUIBehaviour
{
//ToDo
}
}
```
3. There are four main methods in **JUIBehaviour**
- Init => When this class has been added to an Unity GameObject
- Run => This method will be called after Init
- Loop => This method will loop in specific mode and specific frequency
- End => Will be called when the GameObject with this class has been destoryed
4. Example Showcase:
```c#
using UnityEngine;
using UnityEngine.UI;
using JEngine.LifeCycle;
namespace HotUpdateScripts
{
public class Sample : JUIBehaviour
{
public Text HelloText;
public int times;
public override void Init()
{
HelloText = GameObject.Find("Canvas/Text").GetComponent();
times = 0;
}
public override void Run()
{
//Here in run method, we set up the frequency and mode of loop.
frame = false;// Not loop in frame, but in milliseconds
frequency = 1000;//Loop in 1000ms => 1 second
/* OR:
* frame = true;// Loop in frame
* frequency = 10;//Loop in every 10 frames
*/
}
public override void Loop()
{
HelloText.text = "HELLO JEngine * " + times + " times";
times++;
}
}
}
```
5. As you might see, in **Run** method, there is an assignment of **frame and frequency** variable, these variables controls **loop** method.
- frame: **bool**, when it is true, loop runs in **frames**; or loop runs in **milliseconds**
- frequency: **int**, it holds the **interval of frames or milliseconds** which calls loop method
## Development Environment
- Debuging Unity Engine Version: 2019.3.13f1
> Should supports Unity Engine From 2018 LTS til the latest
- .net Environment: .net 2.0 standard
- Operating System: MacOS 10.15.5
> Should also supports windows
## 中文说明
> 将在v0.4更新中补充