# Custom-ava-dataset_Custom-Spatio-Temporally-Action-Video-Dataset
**Repository Path**: YFwinston/Custom-ava-dataset_Custom-Spatio-Temporally-Action-Video-Dataset
## Basic Information
- **Project Name**: Custom-ava-dataset_Custom-Spatio-Temporally-Action-Video-Dataset
- **Description**: No description available
- **Primary Language**: Unknown
- **License**: Not specified
- **Default Branch**: main
- **Homepage**: None
- **GVP Project**: No
## Statistics
- **Stars**: 5
- **Forks**: 4
- **Created**: 2022-04-23
- **Last Updated**: 2024-06-04
## Categories & Tags
**Categories**: Uncategorized
**Tags**: None
## README
# Custom ava dataset, Custom Spatio Temporally Action Video Dataset
Custom ava dataset, Multi-Person Video Dataset Annotation Method of Spatio-Temporally Actions
自定义ava数据集,多人视频的时空动作数据集标注方法
My paper in arxiv::[A Multi-Person Video Dataset Annotation Method of
Spatio-Temporally Actions](https://arxiv.org/pdf/2204.10160.pdf)
AVA paper:[https://arxiv.org/pdf/1705.08421.pdf](https://arxiv.org/pdf/1705.08421.pdf)
下面是我在CSDN、知乎、B站的同步内容:
CSDN:[https://blog.csdn.net/WhiffeYF/article/details/124358725](https://blog.csdn.net/WhiffeYF/article/details/124358725)
知乎:[https://zhuanlan.zhihu.com/p/503031957](https://zhuanlan.zhihu.com/p/503031957 )
B站:[https://www.bilibili.com/video/BV1j3411M7Ba/](https://www.bilibili.com/video/BV1j3411M7Ba/)
# 1 Dataset‘s folder structure 数据集文件结构

# 2 AI platform and project download. AI平台与项目下载
## AI platform. AI 平台
The AI platform I use is: [https://cloud.videojj.com/auth/register?inviter=18452&activityChannel=student_invite](https://cloud.videojj.com/auth/register?inviter=18452&activityChannel=student_invite)
我使用的AI平台:[https://cloud.videojj.com/auth/register?inviter=18452&activityChannel=student_invite](https://cloud.videojj.com/auth/register?inviter=18452&activityChannel=student_invite)
The following operations are all done on this platform.
以下的操作均在该平台的基础上完成。
Instance mirroring selection:Pytorch 1.8.0,python 3.8,CUDA 11.1.1
实例镜像选择:Pytorch 1.8.0,python 3.8,CUDA 11.1.1

## 2.2 project download. AI平台与项目下载
为了让项目可以快速下载,我将项目同步到了码云:[https://gitee.com/YFwinston/Custom-ava-dataset_Custom-Spatio-Temporally-Action-Video-Dataset.git](https://gitee.com/YFwinston/Custom-ava-dataset_Custom-Spatio-Temporally-Action-Video-Dataset.git)
```python
cd /home
git clone https://gitee.com/YFwinston/Custom-ava-dataset_Custom-Spatio-Temporally-Action-Video-Dataset.git
```
# 3 数据集视频准备
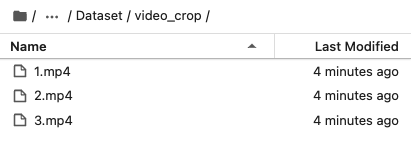
The video is 1 randomly selected from the AVA dataset, and I will crop 3 10-second segments from this video:
视频是从AVA数据集中随机选择了1个,我会从这个视频中裁剪出3个10秒的片段:
```python
https://s3.amazonaws.com/ava-dataset/trainval/2DUITARAsWQ.mp4
```
Execute the following code on the AI platform:
在AI平台执行:
```python
cd /home/Custom-ava-dataset_Custom-Spatio-Temporally-Action-Video-Dataset/Dataset/videos
wget https://s3.amazonaws.com/ava-dataset/trainval/2DUITARAsWQ.mp4 -O ./1.mp4
```

# 4 Video cropping and frame extraction 视频裁剪与抽帧
## 4.1 install ffmpeg 安装ffmpeg
We use ffmpeg for video cropping and frame extraction, so install ffmpeg first
本文使用ffmpeg进行视频裁剪与抽帧,所以先安装ffmpeg
```python
conda install x264 ffmpeg -c conda-forge -y
```
## 4.2 video cropping 视频裁剪
Execute the code under /home/Custom-ava-dataset_Custom-Spatio-Temporally-Action-Video-Dataset/Dataset:
在/home/Custom-ava-dataset_Custom-Spatio-Temporally-Action-Video-Dataset/Dataset下执行:
```python
cd /home/Custom-ava-dataset_Custom-Spatio-Temporally-Action-Video-Dataset/Dataset
sh cut_video.sh
```
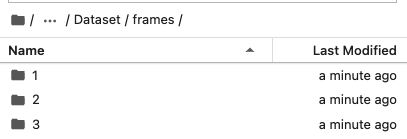
## 4.3 video frame 视频抽帧
Referring to the ava dataset, crop 30 frames per second
参考ava数据集,每秒裁剪30帧
Execute the code under /home/Custom-ava-dataset_Custom-Spatio-Temporally-Action-Video-Dataset/Dataset:
在/home/Custom-ava-dataset_Custom-Spatio-Temporally-Action-Video-Dataset/Dataset 下执行:
```python
cd /home/Custom-ava-dataset_Custom-Spatio-Temporally-Action-Video-Dataset/Dataset
bash cut_frames.sh
```

## 4.4 Consolidate and downscale frames 整合与缩减帧
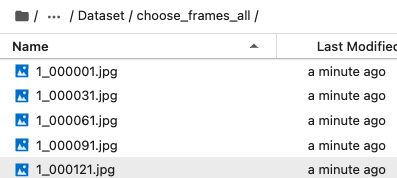
The structure of the frames folder generated in Section 4.3 will be inconvenient in the subsequent yolov5 detection, so I put all the pictures in a folder (choose_frames_all) in the following way.
4.3节中产生的frames文件夹的结构,在后续yolov5检测时会出现不方便,所以我采用下面的方式,将所有的图片放在了一个文件夹(choose_frames_all)中。
It should be noted that not all images need to be detected and labeled. In the 10-second video, the detection labels are: x_000001.jpg, x_000031.jpg, x_000061.jpg, x_000091.jpg, x_0000121jpg, x_000151.jpg, x_000181. jpg, x_000211.jpg, x_000241.jpg, x_000271.jpg, x_000301.jpg.
需要注意的是,并不是,所有图片都需要检测与标注,在10秒的视频中,检测标注:x_000001.jpg、x_000031.jpg、x_000061.jpg、x_000091.jpg、x_0000121jpg、x_000151.jpg、x_000181.jpg、x_000211.jpg、x_000241.jpg、x_000271.jpg、x_000301.jpg。
Execute the code under /home/Custom-ava-dataset_Custom-Spatio-Temporally-Action-Video-Dataset/Dataset:
在/home/Custom-ava-dataset_Custom-Spatio-Temporally-Action-Video-Dataset/Dataset 下执行:
```python
cd /home/Custom-ava-dataset_Custom-Spatio-Temporally-Action-Video-Dataset/Dataset
python choose_frames_all.py 10 0
```
In the above code, 10 represents the length of the video, and 0 represents the start from the 0th second.
其中10代表视频长度,0代表从第0秒开始
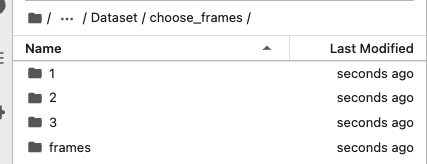
## 4.5 Not consolidate and downscale frames 不整合的缩减帧
The consolidate and downscale frames in 4.4 is for the detection of yolov5, and not consolidate and downscale frames here is for the labeling of VIA.
4.4的整合与缩减是为了yolov5的检测,这里的不整合的缩减是为了VIA的标注。
Execute the code under /home/Custom-ava-dataset_Custom-Spatio-Temporally-Action-Video-Dataset/Dataset:
在/home/Custom-ava-dataset_Custom-Spatio-Temporally-Action-Video-Dataset/Dataset 下执行:
```python
cd /home/Custom-ava-dataset_Custom-Spatio-Temporally-Action-Video-Dataset/Dataset
python choose_frames.py 10 0
```

# 5 yolov5 and deep sort installation. yolov5与deep sort 安装
## 5.1 Install 安装
run the following code
运行以下代码:
```
cd /home/Custom-ava-dataset_Custom-Spatio-Temporally-Action-Video-Dataset/yolovDeepsort
pip install -r requirements.txt
pip install opencv-python-headless==4.1.2.30
wget https://github.com/ultralytics/yolov5/releases/download/v6.1/yolov5s.pt -O /home/Custom-ava-dataset_Custom-Spatio-Temporally-Action-Video-Dataset/yolovDeepsort/yolov5/yolov5s.pt
mkdir -p /root/.config/Ultralytics/
wget https://ultralytics.com/assets/Arial.ttf -O /root/.config/Ultralytics/Arial.ttf
```
The reason for using deep sort: In preparation for generating [train/val].csv, dense_proposals_[train/val/test].pkl will not use the detection results of deep sort.
采用deep sort的原因:为生成[train/val].csv做准备,dense_proposals_[train/val/test].pkl不会用到deep sort的检测结果。
## 5.2 Detect choose_frames_all 对choose_frames_all进行检测
```python
cd /home/Custom-ava-dataset_Custom-Spatio-Temporally-Action-Video-Dataset/yolovDeepsort
python ./yolov5/detect.py --source ../Dataset/choose_frames_all/ --save-txt --save-conf
```
The result is stored in: /home/Custom-ava-dataset_Custom-Spatio-Temporally-Action-Video-Dataset/yolovDeepsort/yolov5/runs/detect/exp
结果存储在:/home/Custom-ava-dataset_Custom-Spatio-Temporally-Action-Video-Dataset/yolovDeepsort/yolov5/runs/detect/exp
# 6 Generate dense_proposals_train.pkl
Execute the code under /home/Custom-ava-dataset_Custom-Spatio-Temporally-Action-Video-Dataset/yolovDeepsort/mywork:
```python
cd /home/Custom-ava-dataset_Custom-Spatio-Temporally-Action-Video-Dataset/yolovDeepsort/mywork
python dense_proposals_train.py ../yolov5/runs/detect/exp/labels ./dense_proposals_train.pkl show
```
# 7 import via 导入via
## 7.1 choose_frames_all_middle
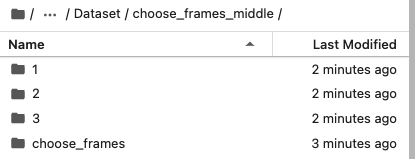
The choose_frames folder under /home/Custom-ava-dataset_Custom-Spatio-Temporally-Action-Video-Dataset/Dataset contains 11 pictures in the 10-second video, but the final generated annotation file does not contain the first 2 pictures and The last 2 pictures. So you need to create a choose_frames_middle folder to store the folders without the first 2 pictures and the last 2 pictures.
/home/Custom-ava-dataset_Custom-Spatio-Temporally-Action-Video-Dataset/Dataset 下的 choose_frames 文件夹中包含10秒视频中11张图片,但是在最后生成的标注文件,不包含前2张图片和后2张图片。所以需要创建一个choose_frames_middle文件夹,存放不含前2张图片与后2张图片的文件夹。
```python
cd /home/Custom-ava-dataset_Custom-Spatio-Temporally-Action-Video-Dataset/Dataset/
python choose_frames_middle.py
```
## 7.2 Generate via annotation file 生成via标注文件
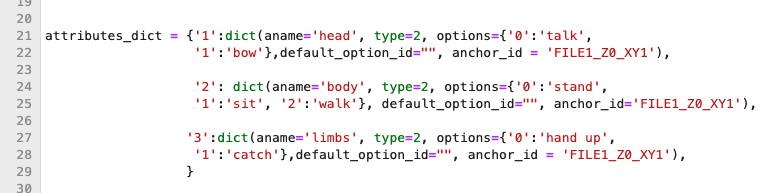
自定义动作在:/home/Custom-ava-dataset_Custom-Spatio-Temporally-Action-Video-Dataset/yolovDeepsort/mywork/dense_proposals_train_to_via.py文件中,具体位置如下图:
The custom action is in: /home/Custom-ava-dataset_Custom-Spatio-Temporally-Action-Video-Dataset/yolovDeepsort/mywork/dense_proposals_train_to_via.py file, the specific location is as follows:
Execute the code under /home/Custom-ava-dataset_Custom-Spatio-Temporally-Action-Video-Dataset/yolovDeepsort/mywork/:
在/home/Custom-ava-dataset_Custom-Spatio-Temporally-Action-Video-Dataset/yolovDeepsort/mywork/下执行:
```python
cd /home/Custom-ava-dataset_Custom-Spatio-Temporally-Action-Video-Dataset/yolovDeepsort/mywork/
python dense_proposals_train_to_via.py ./dense_proposals_train.pkl ../../Dataset/choose_frames_middle/
```
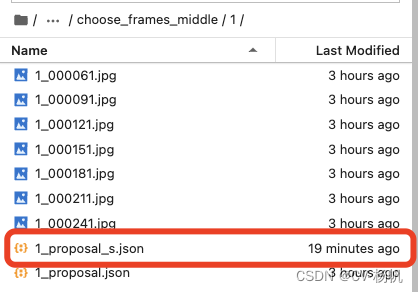
The generated annotation files are saved in: /home/Custom-ava-dataset_Custom-Spatio-Temporally-Action-Video-Dataset/choose_frames_middle
生成的标注文件保存在:/home/Custom-ava-dataset_Custom-Spatio-Temporally-Action-Video-Dataset/choose_frames_middle中

## 7.3 Remove the default value of via 去掉via默认值
标注时有默认值,这个会影响我们的标注,需要取消掉。
There is a default value when labeling, which will affect our labeling and needs to be canceled.
我尝试了很多次,想在生成via标注文件时,去掉标注选项中的默认值,但还是没有实现,那就在生成之后,直接对via的json文件进行操作,去掉默认值。
I have tried many times and want to remove the default value in the annotation option when generating the via annotation file, but it is still not implemented. Then after the generation, directly operate the via json file and remove the default value.
Execute the code under /home/Custom-ava-dataset_Custom-Spatio-Temporally-Action-Video-Dataset/:
在:/home/Custom-ava-dataset_Custom-Spatio-Temporally-Action-Video-Dataset/下运行
```python
cd /home/Custom-ava-dataset_Custom-Spatio-Temporally-Action-Video-Dataset/Dataset
python chang_via_json.py
```
## 7.5 Download choose_frames_middle and VIA annotation 下载choose_frames_middle与VIA标注
Compress the choose_frames_middle file
对choose_frames_middle文件压缩
Execute the code under /home/Custom-ava-dataset_Custom-Spatio-Temporally-Action-Video-Dataset/Dataset:
在/home/Custom-ava-dataset_Custom-Spatio-Temporally-Action-Video-Dataset/Dataset中执行:
```python
apt-get update
apt-get install zip
apt-get install unzip
cd /home/Custom-ava-dataset_Custom-Spatio-Temporally-Action-Video-Dataset/Dataset
zip -r choose_frames_middle.zip choose_frames_middle
```
Download choose_frames_middle.zip
下载:choose_frames_middle.zip
Then use via to label
然后使用via进行标注
via official website:[https://www.robots.ox.ac.uk/~vgg/software/via/](https://www.robots.ox.ac.uk/~vgg/software/via/)
via官网:[https://www.robots.ox.ac.uk/~vgg/software/via/](https://www.robots.ox.ac.uk/~vgg/software/via/)
via annotation tool download link: [https://www.robots.ox.ac.uk/~vgg/software/via/downloads/via3/via-3.0.11.zip](https://www.robots.ox.ac.uk/~vgg/software/via/downloads/via3/via-3.0.11.zip)
via标注工具下载链接:[https://www.robots.ox.ac.uk/~vgg/software/via/downloads/via3/via-3.0.11.zip](https://www.robots.ox.ac.uk/~vgg/software/via/downloads/via3/via-3.0.11.zip)
Click in the annotation tool: via_image_annotator.html
点击标注工具中的: via_image_annotator.html

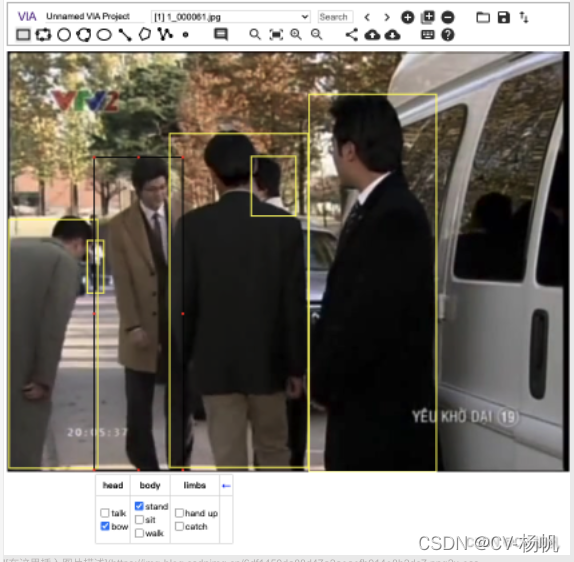
The following picture is the interface of via, 1 represents adding pictures, 2 represents adding annotation files
下图是via的界面,1代表添加图片,2代表添加标注文件

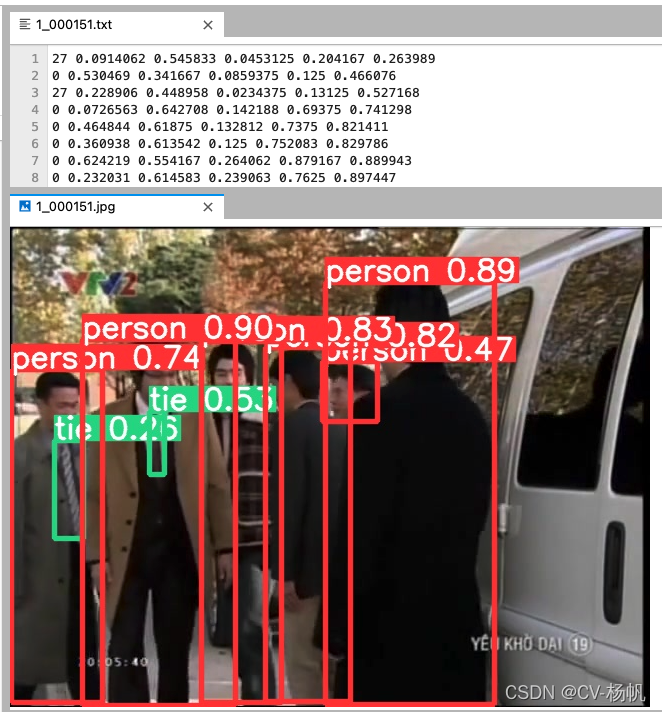
Import the image, open the annotation file (note, open x_proposal_s.json), the final result:
导入图片,打开标注文件(注意,打开x_proposal_s.json),最后结果:
# 8 Extraction of via annotation information. via标注信息的提取
After action annotation, the annotation information of via is saved as a json file. The json file contains: the name of the video, the number of the video frame, the boundding box of the human, and the number of the action category.
经过动作标注,via的标注信息保存为json文件,json文件中包含:视频的名字、视频帧的编号、人的坐标值、动作类别编号
These information are required for the annotation file, and the information in the json file needs to be integrated. This section is to integrate the information in the via.
这些信息都是标注文件所需要的,需要把json文件中的信息整合,这一节就是对via中信息做整合。
## 8.1 ava_train
The following figure is the ava annotation file (ava_train.csv)
下图是ava标注文件(ava_train.csv)

Column 1: The name of the video
第一列:视频的名字
Column 2: the video frame ID, for example, the frame at 15:02 is expressed as 902, and the frame at 15:03 is expressed as 903
第二列:视频帧ID,比如15:02这一帧,表示为902,15:03这一帧表示为903
Column 3-6: the boundding box of the human (x1, y1, x2, y2)
第三列到第六列: 人的坐标值(x1,y1,x2,y2)
Column 7: Action category number
第七列:动作类别编号
Column 8: Person's ID
第八列:人的ID
At present, there is no ID of the last column in our data, and everything else is generated, so let's extract this information first.
目前,我们的数据中没有最后一列的ID,其它都生成了,所以我们先将这些信息提取出来。
## 8.2 Analysis of via Json file. via Json 解析
Parse the json parsing website using the runoob platform: [https://c.runoob.com/front-end/53/](https://c.runoob.com/front-end/53/)
解析使用菜鸟平台的json解析网站:[https://c.runoob.com/front-end/53/](https://c.runoob.com/front-end/53/)


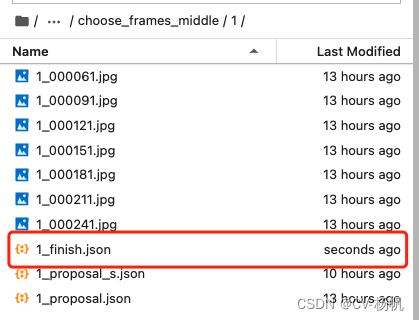
## 8.3 Extract the uploaded json file. 提取上传标注完成的json文件
这里需要注意的是,我给每个标注完成的文件取名:视频名_finish.json,如视频1,标注完成后的名字为:1_finish.json
It should be noted here that I named the labeled file: video_name_finish.json, such as video 1, the marked name is: 1_finish.json
Execute the code under /home/Custom-ava-dataset_Custom-Spatio-Temporally-Action-Video-Dataset/Dataset:
在/home/Custom-ava-dataset_Custom-Spatio-Temporally-Action-Video-Dataset/Dataset中执行:
```python
cd /home/Custom-ava-dataset_Custom-Spatio-Temporally-Action-Video-Dataset/Dataset/
python json_extract.py
```
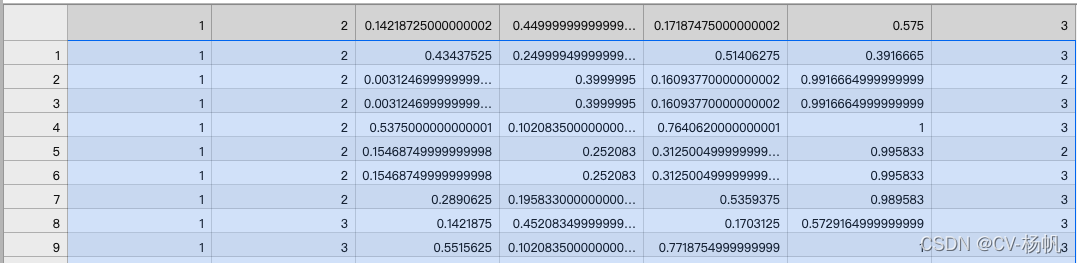
It will be generated under /home/Custom-ava-dataset_Custom-Spatio-Temporally-Action-Video-Dataset/Dataset/:
train_without_personID.csv
会在/home/Custom-ava-dataset_Custom-Spatio-Temporally-Action-Video-Dataset/Dataset/下生成:
train_without_personID.csv
# 9 deep sort
## 9.1 dense_proposals_train_deepsort.py
Since deepsort needs to send 2 frames of pictures in advance, and then can label the person's ID from the third frame, dense_proposals_train.pkl starts from the third frame (that is, 0, 1 are missing), so 0, 1 need to be added.
由于deepsort需要提前送入2帧图片,然后才能从第三帧开始标注人的ID,dense_proposals_train.pkl是从第三张开始的(即缺失了0,1),所以需要将0,1添加
Execute the code under: /home/Custom-ava-dataset_Custom-Spatio-Temporally-Action-Video-Dataset/yolovDeepsort/mywork
在/home/Custom-ava-dataset_Custom-Spatio-Temporally-Action-Video-Dataset/yolovDeepsort/mywork下执行
```python
cd /home/Custom-ava-dataset_Custom-Spatio-Temporally-Action-Video-Dataset/yolovDeepsort/mywork
python dense_proposals_train_deepsort.py ../yolov5/runs/detect/exp/labels ./dense_proposals_train_deepsort.pkl show
```
Next use deep sort to associate the human's ID
接下来使用deep sort来关联人的ID
Send the image and the boundding box detected by yolov5 to deep sort for detection
将图片与yolov5检测出来的坐标,送入deep sort进行检测
Execute the code under /home/Custom-ava-dataset_Custom-Spatio-Temporally-Action-Video-Dataset/yolovDeepsort/:
在/home/Custom-ava-dataset_Custom-Spatio-Temporally-Action-Video-Dataset/yolovDeepsort/执行命令如下:
```python
cd /home/Custom-ava-dataset_Custom-Spatio-Temporally-Action-Video-Dataset/yolovDeepsort/
wget https://drive.google.com/drive/folders/1xhG0kRH1EX5B9_Iz8gQJb7UNnn_riXi6 -O ./deep_sort_pytorch/deep_sort/deep/checkpoint/ckpt.t7
python yolov5_to_deepsort.py --source /home/Custom-ava-dataset_Custom-Spatio-Temporally-Action-Video-Dataset/Dataset/frames
```
ckpt.t7 can be downloaded separately and then uploaded to the AI platform
ckpt.t7 可以单独下载后上传AI平台br<>
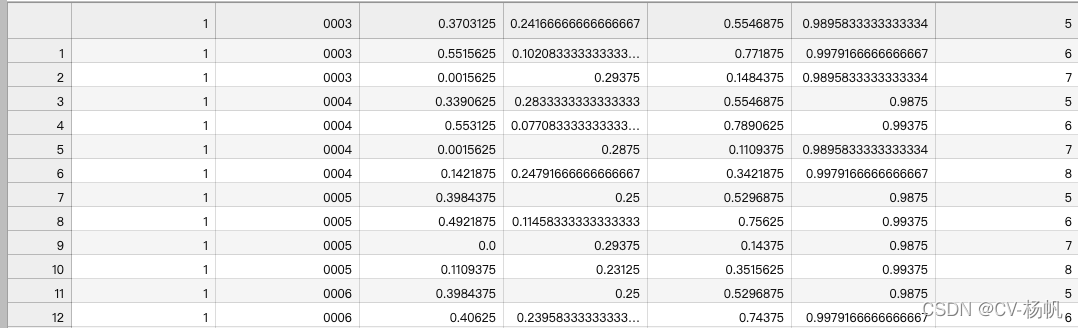
The result is in: /home/Custom-ava-dataset_Custom-Spatio-Temporally-Action-Video-Dataset/Dataset/train_personID.csv, as shown below
结果在:/home/Custom-ava-dataset_Custom-Spatio-Temporally-Action-Video-Dataset/Dataset/train_personID.csv,如下图
## 9.2 Fusion of actions and personID 融合actions与personID
There are already 2 files:
目前已经有2个文件了:
1,train_personID.csv
Include: boundding box, personID
包含 坐标、personID
2,train_without_personID.csv
Include: boundding box, actions
包含 坐标、actions
So now we need to put the two together
所以现在需要将两者拼在一起
Execute the code under:/home/Custom-ava-dataset_Custom-Spatio-Temporally-Action-Video-Dataset/Dataset/
在/home/Custom-ava-dataset_Custom-Spatio-Temporally-Action-Video-Dataset/Dataset/下执行
```python
cd /home/Custom-ava-dataset_Custom-Spatio-Temporally-Action-Video-Dataset/Dataset/
python train_temp.py
```
The result is in /home/Custom-ava-dataset_Custom-Spatio-Temporally-Action-Video-Dataset/Dataset/train_temp.csv
最后结果:/home/Custom-ava-dataset_Custom-Spatio-Temporally-Action-Video-Dataset/Dataset/train_temp.csv
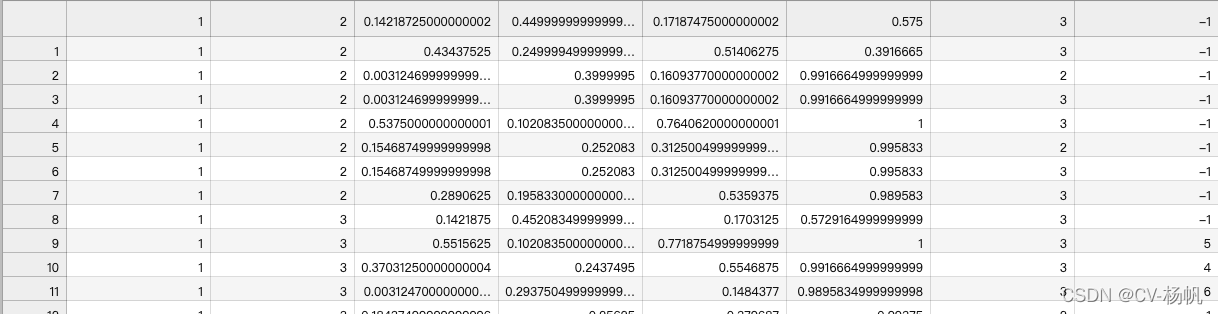
After the operation, you will find that some IDs are -1. These -1s are data that deepsort has not detected. The reason is that people appear for the first time or the appearance time is too short, and deepsort does not detect IDs.
运行结束后,会发现有些ID是-1,这些-1是deepsort未检测出来的数据,原因是人首次出现或者出现时间过短,deepsort未检测出ID。
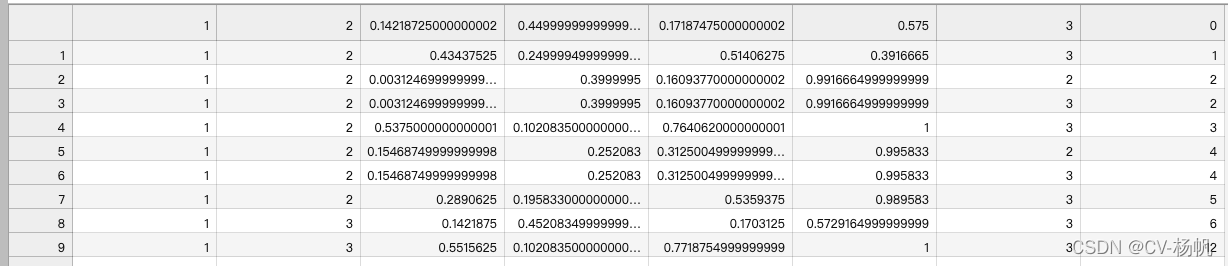
## 9.3 Fix ava_train_temp.csv 修正ava_train_temp.csv
For the case where -1 exists in train_temp.csv, it needs to be corrected
针对train_temp.csv中存在-1的情况,需要进行修正
Execute the code under:/home/Custom-ava-dataset_Custom-Spatio-Temporally-Action-Video-Dataset/Dataset/
在/home/Custom-ava-dataset_Custom-Spatio-Temporally-Action-Video-Dataset/Dataset/下执行
```python
cd /home/Custom-ava-dataset_Custom-Spatio-Temporally-Action-Video-Dataset/Dataset/
python train.py
```
The result is in:/home/Custom-ava-dataset_Custom-Spatio-Temporally-Action-Video-Dataset/Dataset/annotations/train.csv
结果在:/home/Custom-ava-dataset_Custom-Spatio-Temporally-Action-Video-Dataset/Dataset/annotations/train.csv
# 10 Generation of other annotation files 其它标注文件的生成
## 10.1 train_excluded_timestamps.csv
I spent almost 85% of the content talking about the method of ava_train.csv, and the generation method of the rest of the annotation files is relatively simple
我几乎花了85%的内容说了ava_train.csv的方法,其余的标注文件的生成方法相对较为简单
```python
cd /home/Custom-ava-dataset_Custom-Spatio-Temporally-Action-Video-Dataset/Dataset/annotations
touch train_excluded_timestamps.csv
```
## 10.2 included_timestamps.txt
```python
cd /home/Custom-ava-dataset_Custom-Spatio-Temporally-Action-Video-Dataset/Dataset/annotations
touch included_timestamps.txt
```
Then in included_timestamps.txt write:
然后在included_timestamps.txt 中写入
```python
02
03
04
05
06
07
08
```
## 10.3 action_list.pbtxt
```python
cd /home/Custom-ava-dataset_Custom-Spatio-Temporally-Action-Video-Dataset/Dataset/annotations
touch action_list.pbtxt
```
```python
item {
name: "talk"
id: 1
}
item {
name: "bow"
id: 2
}
item {
name: "stand"
id: 3
}
item {
name: "sit"
id: 4
}
item {
name: "walk"
id: 5
}
item {
name: "hand up"
id: 6
}
item {
name: "catch"
id: 7
}
```
## 10.4 dense_proposals_train.pkl
```python
cp /home/Custom-ava-dataset_Custom-Spatio-Temporally-Action-Video-Dataset/yolovDeepsort/mywork/dense_proposals_train.pkl //home/Custom-ava-dataset_Custom-Spatio-Temporally-Action-Video-Dataset/Dataset/annotations
```
# 11 val file generation. val文件的生成
我只是做一个样例,所以我就把train与val设置为一样的
I'm just doing a sample, so I set train and val to be the same
## 11.1 dense_proposals_val.pkl
```python
cp /home/Custom-ava-dataset_Custom-Spatio-Temporally-Action-Video-Dataset/Dataset/annotations/dense_proposals_train.pkl /home/Custom-ava-dataset_Custom-Spatio-Temporally-Action-Video-Dataset/Dataset/annotations/dense_proposals_val.pkl
```
## 11.2 val.csv
```python
cp /home/Custom-ava-dataset_Custom-Spatio-Temporally-Action-Video-Dataset/Dataset/annotations/train.csv /home/Custom-ava-dataset_Custom-Spatio-Temporally-Action-Video-Dataset/Dataset/annotations/val.csv
```
## 11.3 train_excluded_timestamps.csv
```python
cp /home/Custom-ava-dataset_Custom-Spatio-Temporally-Action-Video-Dataset/Dataset/annotations/train_excluded_timestamps.csv /home/Custom-ava-dataset_Custom-Spatio-Temporally-Action-Video-Dataset/Dataset/annotations/val_excluded_timestamps.csv
```
# 12 rawframes
In the name of the video frame, there is a problem that the name of the video frame does not match the training, so it is necessary to modify the name of the picture in /home/Dataset/frames
在取名上,裁剪的视频帧存在与训练不匹配的问题,所以需要对/home/Dataset/frames中的图片进行名字修改
for example:
例如:
original name 原本的名字:rawframes/1/1_000001.jpg
target name 目标名字:rawframes/1/img_00001.jpg
```python
cp -r /home/Custom-ava-dataset_Custom-Spatio-Temporally-Action-Video-Dataset/Dataset/frames/* /home/Custom-ava-dataset_Custom-Spatio-Temporally-Action-Video-Dataset/Dataset/rawframes
cd /home/Custom-ava-dataset_Custom-Spatio-Temporally-Action-Video-Dataset/yolovDeepsort/mywork/
python change_raw_frames.py
```

# 13 Annotation file correction. 标注文件修正
## 13.1 dense_proposals_train
```python
cd /home/Custom-ava-dataset_Custom-Spatio-Temporally-Action-Video-Dataset/yolovDeepsort/mywork
python change_dense_proposals_train.py
```
## 13.2 dense_proposals_val
```python
cd /home/Custom-ava-dataset_Custom-Spatio-Temporally-Action-Video-Dataset/yolovDeepsort/mywork
python change_dense_proposals_val.py
```
# 14 mmaction2 install
```python
cd /home
git clone https://gitee.com/YFwinston/mmaction2_YF.git
pip install mmcv-full==1.3.17 -f https://download.openmmlab.com/mmcv/dist/cu111/torch1.8.0/index.html
pip install opencv-python-headless==4.1.2.30
pip install moviepy
cd mmaction2_YF
pip install -r requirements/build.txt
pip install -v -e .
mkdir -p ./data/ava
cd ..
git clone https://gitee.com/YFwinston/mmdetection.git
cd mmdetection
pip install -r requirements/build.txt
pip install -v -e .
cd ../mmaction2_YF
wget https://download.openmmlab.com/mmdetection/v2.0/faster_rcnn/faster_rcnn_r50_fpn_2x_coco/faster_rcnn_r50_fpn_2x_coco_bbox_mAP-0.384_20200504_210434-a5d8aa15.pth -P ./Checkpionts/mmdetection/
wget https://download.openmmlab.com/mmaction/recognition/slowfast/slowfast_r50_8x8x1_256e_kinetics400_rgb/slowfast_r50_8x8x1_256e_kinetics400_rgb_20200716-73547d2b.pth -P ./Checkpionts/mmaction/
```
# 15 Train and Test 训练与测试
## 15.1 configuration file 配置文件
Create my_slowfast_kinetics_pretrained_r50_4x16x1_20e_ava_rgb.py under /mmaction2/configs/detection/ava/
在 /mmaction2_YF/configs/detection/ava/下创建 my_slowfast_kinetics_pretrained_r50_4x16x1_20e_ava_rgb.py
```python
cd /home/mmaction2_YF/configs/detection/ava/
touch my_slowfast_kinetics_pretrained_r50_4x16x1_20e_ava_rgb.py
```
```python
# model setting
model = dict(
type='FastRCNN',
backbone=dict(
type='ResNet3dSlowFast',
pretrained=None,
resample_rate=8,
speed_ratio=8,
channel_ratio=8,
slow_pathway=dict(
type='resnet3d',
depth=50,
pretrained=None,
lateral=True,
conv1_kernel=(1, 7, 7),
dilations=(1, 1, 1, 1),
conv1_stride_t=1,
pool1_stride_t=1,
inflate=(0, 0, 1, 1),
spatial_strides=(1, 2, 2, 1)),
fast_pathway=dict(
type='resnet3d',
depth=50,
pretrained=None,
lateral=False,
base_channels=8,
conv1_kernel=(5, 7, 7),
conv1_stride_t=1,
pool1_stride_t=1,
spatial_strides=(1, 2, 2, 1))),
roi_head=dict(
type='AVARoIHead',
bbox_roi_extractor=dict(
type='SingleRoIExtractor3D',
roi_layer_type='RoIAlign',
output_size=8,
with_temporal_pool=True),
bbox_head=dict(
type='BBoxHeadAVA',
in_channels=2304,
num_classes=81,
multilabel=True,
dropout_ratio=0.5)),
train_cfg=dict(
rcnn=dict(
assigner=dict(
type='MaxIoUAssignerAVA',
pos_iou_thr=0.9,
neg_iou_thr=0.9,
min_pos_iou=0.9),
sampler=dict(
type='RandomSampler',
num=32,
pos_fraction=1,
neg_pos_ub=-1,
add_gt_as_proposals=True),
pos_weight=1.0,
debug=False)),
test_cfg=dict(rcnn=dict(action_thr=0.002)))
dataset_type = 'AVADataset'
data_root = '/home/Custom-ava-dataset_Custom-Spatio-Temporally-Action-Video-Dataset/Dataset/rawframes'
anno_root = '/home/Custom-ava-dataset_Custom-Spatio-Temporally-Action-Video-Dataset/Dataset/annotations'
#ann_file_train = f'{anno_root}/ava_train_v2.1.csv'
ann_file_train = f'{anno_root}/train.csv'
#ann_file_val = f'{anno_root}/ava_val_v2.1.csv'
ann_file_val = f'{anno_root}/val.csv'
#exclude_file_train = f'{anno_root}/ava_train_excluded_timestamps_v2.1.csv'
#exclude_file_val = f'{anno_root}/ava_val_excluded_timestamps_v2.1.csv'
exclude_file_train = f'{anno_root}/train_excluded_timestamps.csv'
exclude_file_val = f'{anno_root}/val_excluded_timestamps.csv'
#label_file = f'{anno_root}/ava_action_list_v2.1_for_activitynet_2018.pbtxt'
label_file = f'{anno_root}/action_list.pbtxt'
proposal_file_train = (f'{anno_root}/dense_proposals_train.pkl')
proposal_file_val = f'{anno_root}/dense_proposals_val.pkl'
img_norm_cfg = dict(
mean=[123.675, 116.28, 103.53], std=[58.395, 57.12, 57.375], to_bgr=False)
train_pipeline = [
dict(type='SampleAVAFrames', clip_len=32, frame_interval=2),
dict(type='RawFrameDecode'),
dict(type='RandomRescale', scale_range=(256, 320)),
dict(type='RandomCrop', size=256),
dict(type='Flip', flip_ratio=0.5),
dict(type='Normalize', **img_norm_cfg),
dict(type='FormatShape', input_format='NCTHW', collapse=True),
# Rename is needed to use mmdet detectors
dict(type='Rename', mapping=dict(imgs='img')),
dict(type='ToTensor', keys=['img', 'proposals', 'gt_bboxes', 'gt_labels']),
dict(
type='ToDataContainer',
fields=[
dict(key=['proposals', 'gt_bboxes', 'gt_labels'], stack=False)
]),
dict(
type='Collect',
keys=['img', 'proposals', 'gt_bboxes', 'gt_labels'],
meta_keys=['scores', 'entity_ids'])
]
# The testing is w/o. any cropping / flipping
val_pipeline = [
dict(type='SampleAVAFrames', clip_len=32, frame_interval=2),
dict(type='RawFrameDecode'),
dict(type='Resize', scale=(-1, 256)),
dict(type='Normalize', **img_norm_cfg),
dict(type='FormatShape', input_format='NCTHW', collapse=True),
# Rename is needed to use mmdet detectors
dict(type='Rename', mapping=dict(imgs='img')),
dict(type='ToTensor', keys=['img', 'proposals']),
dict(type='ToDataContainer', fields=[dict(key='proposals', stack=False)]),
dict(
type='Collect',
keys=['img', 'proposals'],
meta_keys=['scores', 'img_shape'],
nested=True)
]
data = dict(
#videos_per_gpu=9,
#workers_per_gpu=2,
videos_per_gpu=5,
workers_per_gpu=2,
val_dataloader=dict(videos_per_gpu=1),
test_dataloader=dict(videos_per_gpu=1),
train=dict(
type=dataset_type,
ann_file=ann_file_train,
exclude_file=exclude_file_train,
pipeline=train_pipeline,
label_file=label_file,
proposal_file=proposal_file_train,
person_det_score_thr=0.9,
data_prefix=data_root,
start_index=1,),
val=dict(
type=dataset_type,
ann_file=ann_file_val,
exclude_file=exclude_file_val,
pipeline=val_pipeline,
label_file=label_file,
proposal_file=proposal_file_val,
person_det_score_thr=0.9,
data_prefix=data_root,
start_index=1,))
data['test'] = data['val']
#optimizer = dict(type='SGD', lr=0.1125, momentum=0.9, weight_decay=0.00001)
optimizer = dict(type='SGD', lr=0.0125, momentum=0.9, weight_decay=0.00001)
# this lr is used for 8 gpus
optimizer_config = dict(grad_clip=dict(max_norm=40, norm_type=2))
# learning policy
lr_config = dict(
policy='step',
step=[10, 15],
warmup='linear',
warmup_by_epoch=True,
warmup_iters=5,
warmup_ratio=0.1)
#total_epochs = 20
total_epochs = 100
checkpoint_config = dict(interval=1)
workflow = [('train', 1)]
evaluation = dict(interval=1, save_best='mAP@0.5IOU')
log_config = dict(
interval=20, hooks=[
dict(type='TextLoggerHook'),
])
dist_params = dict(backend='nccl')
log_level = 'INFO'
work_dir = ('./work_dirs/ava/'
'slowfast_kinetics_pretrained_r50_4x16x1_20e_ava_rgb')
load_from = ('https://download.openmmlab.com/mmaction/recognition/slowfast/'
'slowfast_r50_4x16x1_256e_kinetics400_rgb/'
'slowfast_r50_4x16x1_256e_kinetics400_rgb_20200704-bcde7ed7.pth')
resume_from = None
find_unused_parameters = False
```
## 15.2 训练
```python
cd /home/mmaction2_YF
python tools/train.py configs/detection/ava/my_slowfast_kinetics_pretrained_r50_4x16x1_20e_ava_rgb.py --validate
```
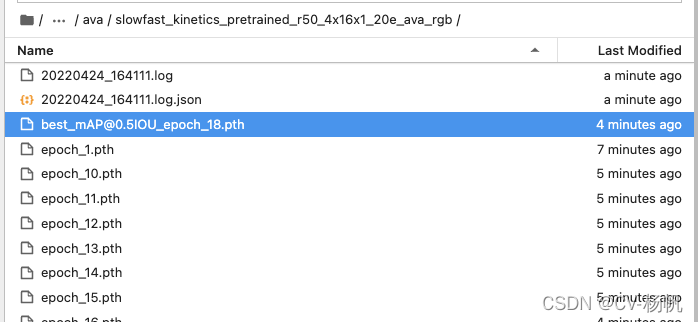
The weights after training are:
训练后的权重在:home/mmaction2/work_dirs/ava/slowfast_kinetics_pretrained_r50_4x16x1_20e_ava_rgb:

## 15.3 Test 测试
First, create a new label_map
首先,创建新的label_map
```python
cd /home/mmaction2_YF/tools/data/ava
touch label_map2.txt
```
The content of label_map2.txt is as follows:
label_map2.txt内容如下:
```python
1: talk
2: bow
3: stand
4: sit
5: walk
6: hand up
7: catch
```
Then run:
然后运行:
```python
cd /home/mmaction2_YF
python demo/demo_spatiotemporal_det.py --config configs/detection/ava/my_slowfast_kinetics_pretrained_r50_4x16x1_20e_ava_rgb.py --checkpoint /home/mmaction2_YF/work_dirs/ava/slowfast_kinetics_pretrained_r50_4x16x1_20e_ava_rgb/best_mAP@0.5IOU_epoch_10.pth --det-config demo/faster_rcnn_r50_fpn_2x_coco.py --det-checkpoint Checkpionts/mmdetection/faster_rcnn_r50_fpn_2x_coco_bbox_mAP-0.384_20200504_210434-a5d8aa15.pth --video /home/Custom-ava-dataset_Custom-Spatio-Temporally-Action-Video-Dataset/Dataset/video_crop/1.mp4 --out-filename demo/det_1.mp4 --det-score-thr 0.5 --action-score-thr 0.5 --output-stepsize 4 --output-fps 6 --label-map tools/data/ava/label_map2.txt
```
where best_mAP@0.5IOU_epoch_47.pth is the weight after training, and 441.mp4 is the video uploaded by yourself
其中 best_mAP@0.5IOU_epoch_47.pth 是训练后的权重,441.mp4是自己上传的视频
The detection result is in: /home/mmaction2/demo/det_1.mp4
检测结果在:/home/mmaction2/demo/det_1.mp4
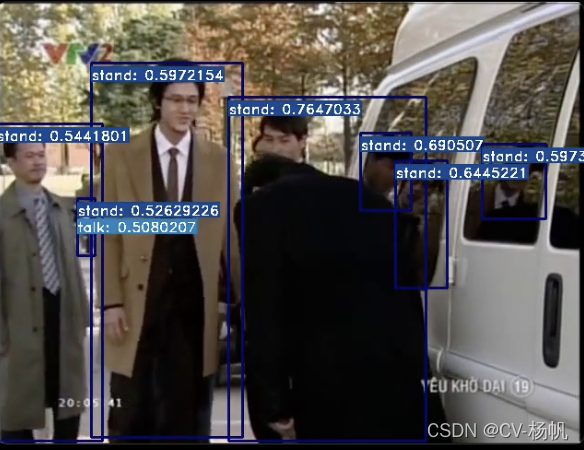
The test results are not good for two reasons:
检测结果不好,原因有两个:
1. The dataset is very small
1,数据集非常小
2. Almost 90% of the labels are stand, causing imbalance
2,几乎90%的标注为stand,造成了不平衡